Courses: Introduction to GoldSim:
Unit 13 - Modeling Discrete Events
Lesson 12 - Routing Events
In Unit 7, we discussed the importance of redirecting or routing flows through a system using the Splitter and Allocator elements. Discrete events often have a similar requirement: an event occurs (e.g., person arrives at the security checkpoint), and that person needs to be redirected or routed into one of several directions (e.g., an expedited line or a regular line) based on some specified criteria.
GoldSim provides two different elements to facilitate this: a Random Choice element and a Decision element. These are best illustrated by considering two additional Examples. These Examples will build upon the security checkpoint example we discussed in the previous Lesson.
The first model we will look at can be found in the “Examples” subfolder of the “Basic GoldSim Course” folder you should have downloaded and unzipped to your Desktop. In that folder, open a model file named Example23_TSA2.gsm.
The model looks like this:
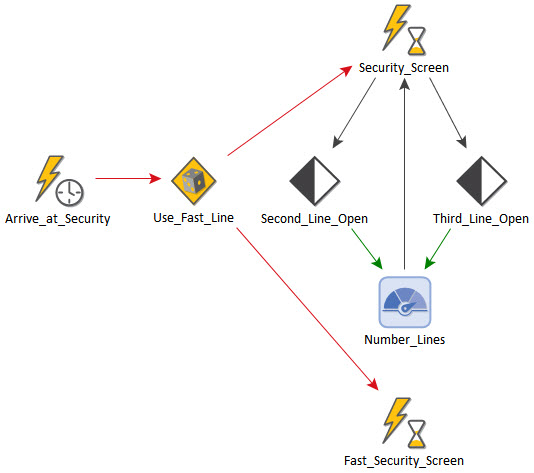
As pointed out above, this model extends the security checkpoint example we discussed in the previous Lesson. In particular, it adds the following logic:
- In addition to the three security lines that open and close based on the size of the queue, there is always a “fast security line” open that processes people faster (in approximately 20 seconds instead of 30 seconds).
- 20% of the people who arrive at security are randomly selected to go to the fast security line.
To represent this, we needed to add two elements to the original model. First, we added a second Event Delay that represents the fast security line:
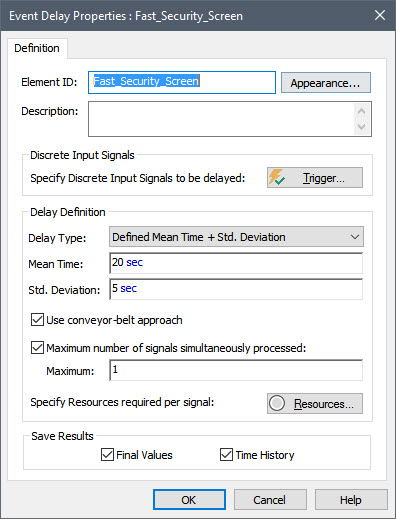
The key change to the model, however, was the addition of a new type of element, the Random Choice (named Use_Fast_Line). Open that element and look at it now:
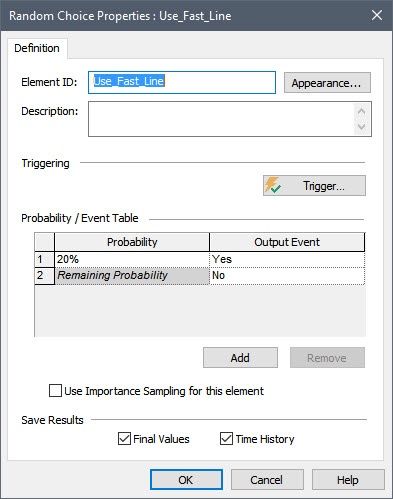
There is a Triggering dialog where you enter the events that you want to route using the Random Choice. Open the Triggering dialog and you will see that it is simply being triggered by the Timed Event representing arrivals at the security checkpoint.
You must specify two or more Output Events. For each, you provide a name and (for all but the last) a Probability. When the element is triggered, it randomly selects one of the Output Events based on the specified discrete probabilities, and emits a discrete event signal from that output. In our model, we have just two Output Events: Yes (i.e., use the fast line) and No (use the regular line). The probability of Yes is set to 20%.
Left-click on the output port of the Random Choice to show its output interface with all of the element’s outputs (indented under the element name):
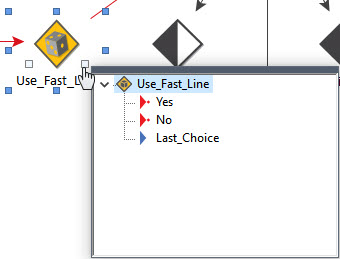
Note that this element does not have a primary output (all outputs are secondary outputs). There is a discrete signal (i.e., the same type of output generated by a Timed Event) for each specified Output Event (in this case, named Yes and No). There is also an additional output (Last_Choice) that simply records the integer number of the last random output choice (in this case, 1 or 2).
In this model, approximately 20% of the new arrivals will generate a Yes event, and 80% will generate a No event. The No event is routed to (and triggers) the “Security_Screen” Event Delay:
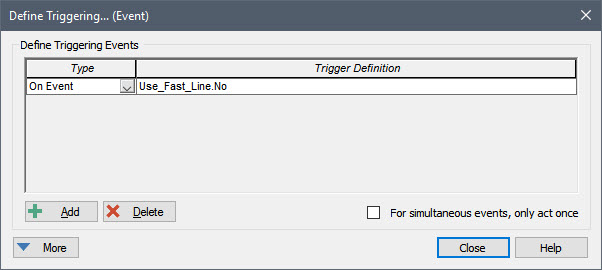
Similarly, the Yes event is routed to (and triggers) the “Fast_Security_Screen” Event Delay.
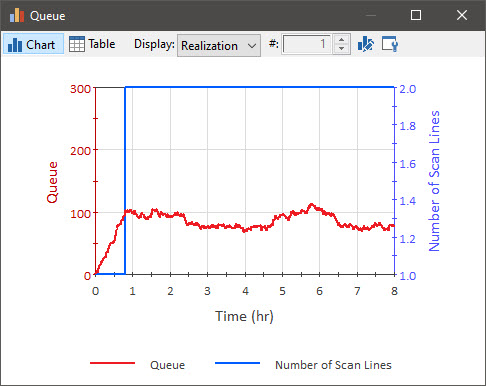
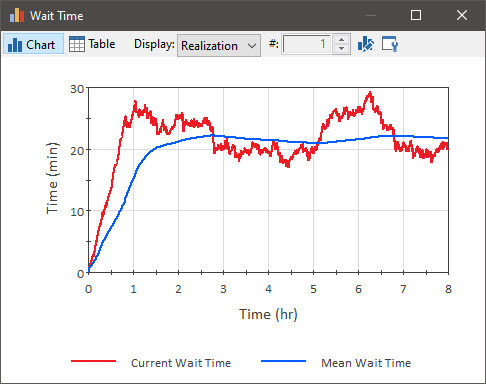
If we view the results, we see that (obviously) the queue and wait times become smaller (due to the presence of the fast screening line):
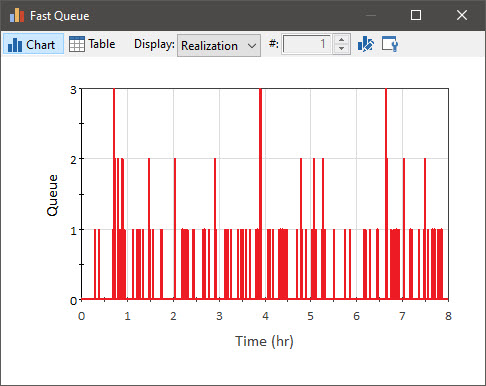
Note that the queue for the fast screening line is always very small (from 0 to 3):
This model also contains a Final Value Result element (we introduced these kinds of results in Unit 7, Lesson 8). It is the Result element named Number Processed. In this case, we are displaying the number of people processed by the Fast station and the Normal station:
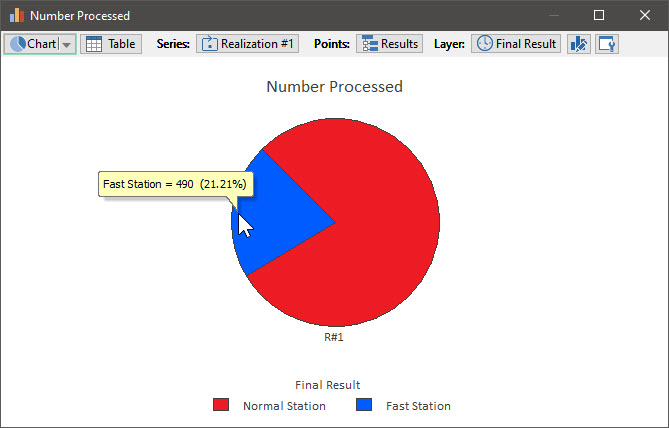
As we would expect, the Fast station processed approximately 20%.
Let’s now extend our security checkpoint model one final time. The next model we will look at can also be found in the “Examples” subfolder of the “Basic GoldSim Course” folder you should have downloaded and unzipped to your Desktop. In that folder, open a model file named Example24_TSA3.gsm.
The model looks like this:
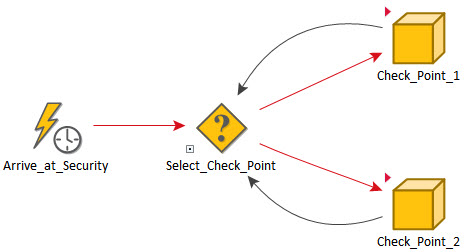
In this model, we assume that the airport has not one, but two security checkpoints, which operate according to the following logic:
- Each security checkpoint operates in exactly the same manner as in the previous problem (i.e., a regular screening point that can expand to up to three lines based on the size of the queue, and a fast screen line).
- The second checkpoint opens after 4 hours.
- Once both checkpoints are open, people are directed to whichever checkpoint has the smallest queue.
To represent this, all of the elements used to represent the previous model (starting with the Random Choice) were copied into a localized Container (discussed in Unit 9, Lesson 6). This localized Container was then copied (and renamed), resulting in two identical systems (Check_Point_1 and Check_Point_2). If you enter either one of these Containers, you will see that the contents are indeed identical to the system we discussed in the previous Example.
The key change to the model, however, was the addition of a new type of element, the Decision (named Select_Check_Point). Open that element and look at it now:
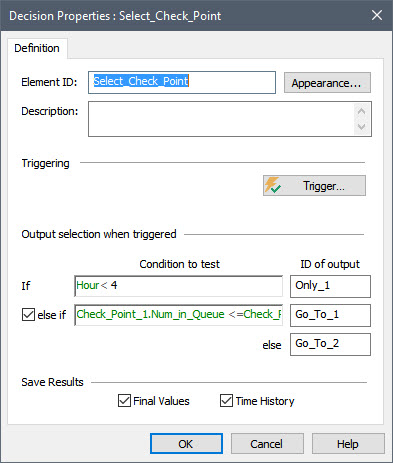
There is a Triggering dialog where you enter the events that you want to route using the Decision. Open the Triggering dialog and you will see that it is simply being triggered by the Timed Event representing arrivals ready to go though one of the two security checkpoints.
When the element is triggered, it evaluates the Condition to test field to determine which output will emit a discrete event signal. The Condition to test field accepts any condition output or conditional expression. For each, you provide a name (ID of output).
In this case, whenever the element is triggered, if “Hour < 4” is True, a discrete event signal is emitted from the “Only_1” output of the element (referenced as Select_Check_Point.Only_1). If “Hour < 4” is False, but the next condition (Check_Point_1.Num_in_Queue <=Check_Point_2.Num_in_Queue) is True, then a discrete event signal is emitted from the “Go_To_1” output of the element (referenced as Select_Check_Point.Go_To_1). If neither of these conditions are True, a discrete event signal is emitted from the “Go_To_2” output of the element (referenced as Select_Check_Point.Go_To_2).
That is, for the first four hours, all people are routed to the first checkpoint. Afterward, they are routed to both (depending on the queue length). The logic is set up to maintain equal queue lengths at each check point. Therefore, the fraction routed to each checkpoint will be approximately the same.
Left-click on the output port of the Decision to show its output interface with all of the element’s outputs (indented under the element name):
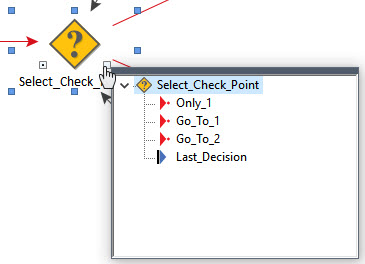
Note that this element does not have a primary output (all outputs are secondary outputs). There is a discrete signal (i.e., the same type of output generated by a Timed Event) for each of the three possible outputs events (in this case, named Only_1, Go_To_1, and Go_To_2). There is also an additional output (Last_Decision) that simply records the integer number of the last decision (1, 2 or 3).
In this model, for the first 4 hours, the Only_1 event is the only event that will be generated. After 4 hours, both Go_To_1 and Go_To_2 events will be generated. The Only_1 and Got_To_1 events are both routed to (and trigger) the Use_Fast_Line Random Choice in Check_Point_1:
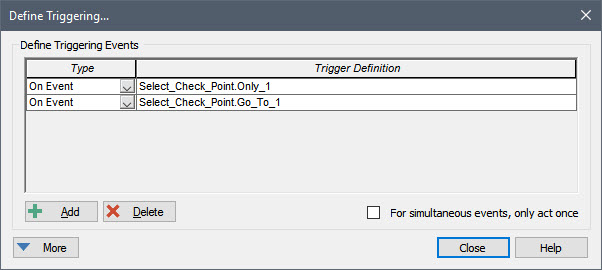
Similarly, the Go_To_2 event is routed to (and triggers) the Use_Fast_Line Random Choice in Check_Point_2:
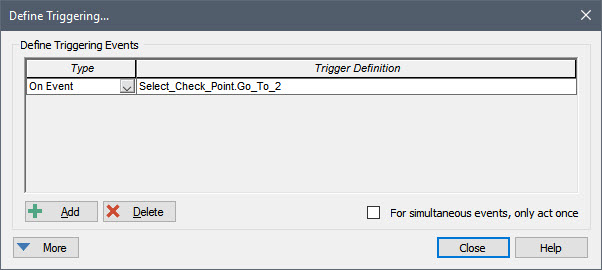
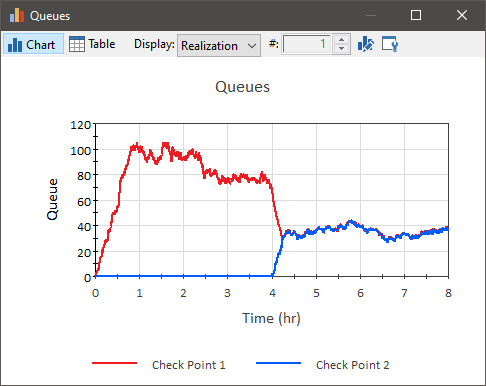
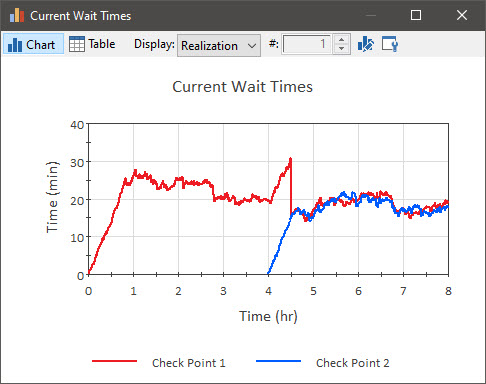
If we view the results at the top of the model (the Time History Result elements named Queues and Current Wait Times), we see that once the second checkpoint opens the queue (and wait time) for the first one rapidly drops (and subsequently both check points have essentially the same queue length and wait times):
You can read more about Random Choice and Decision elements in GoldSim Help.
